Ecommerce tracking guide that will walk you through the step-by-step setup for Google Analytics 4 (GA4) using Google Tag Manager (GTM).
Introduction
This ecommerce tracking setup is crucial for online store owners to analyze sales, configure conversions, and boost the success of Google Ads campaigns. Although we will focus on WordPress sites with WooCommerce integration, the principles are applicable to other platforms as well. Let’s dive in! ✌️
I uploaded a step-by-step YouTube video in the Romanian language. English subtitles are available.
Ecommerce Tracking in GA4 is Essential
Implementing ecommerce tracking in GA4 allows you to:
- Track product views, cart additions, and purchases
- Analyze revenue and sales data
- Optimize marketing strategies and ad spend
- Enhance user experience on your online store
Prerequisites
Before we begin, check if your website pushes important information (such as price, discounts, product name, etc.) into the data layers. These data layers will enable Google Tag Manager to extract user interaction data and send it to GA4.
If you are unsure how to perform the check, please follow the ecommerce tracking guide below.
Types of E-commerce Events in GA4: Google’s documentation outlines several types of e-commerce events that can be tracked.
Data Layer Check
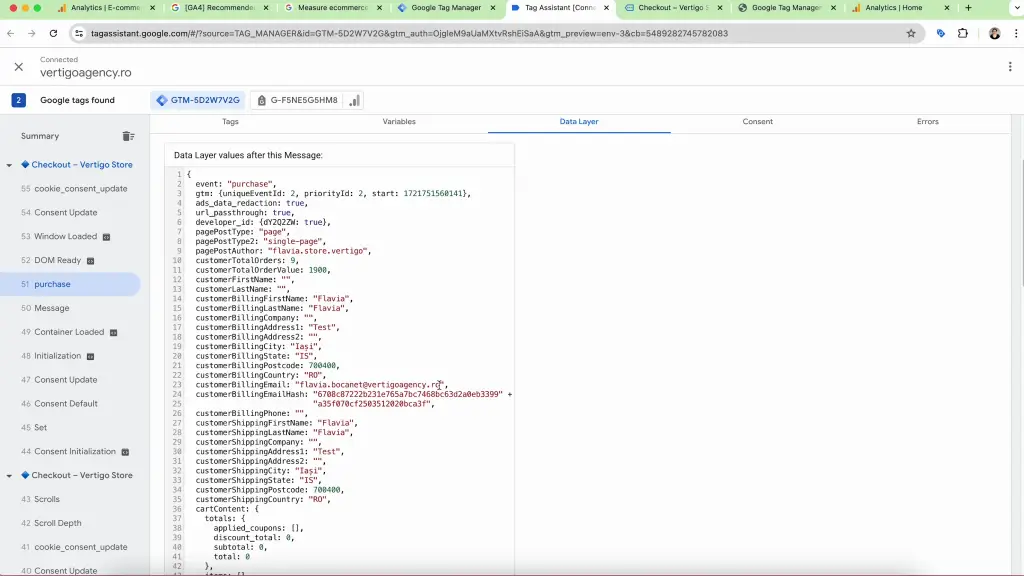
- Simulate a Purchase: Enter Google Tag Manager and click on Preview. Add the URL of your website and simulate a purchase: view an item, add a product to the cart, proceed to checkout, and place an order.
- Check the Data Layer: In the Summary sidebar, check if events as view_item, add_to_cart or purchase are present. Click on the Data Layer tab of the desired event and check if it is populated with such information as seen in the image below.
Setting Up the Data Layers
To set up the ecommerce tracking, we need to ensure that we push the needed information into the data layer. If you’re using WooCommerce on WordPress, follow these steps:
- Install and Activate GTM4WP Plugin: Go to your WordPress dashboard, navigate to Plugins > Add New Plugin, and search for ‘gtm 4wp’. Install and activate the plugin

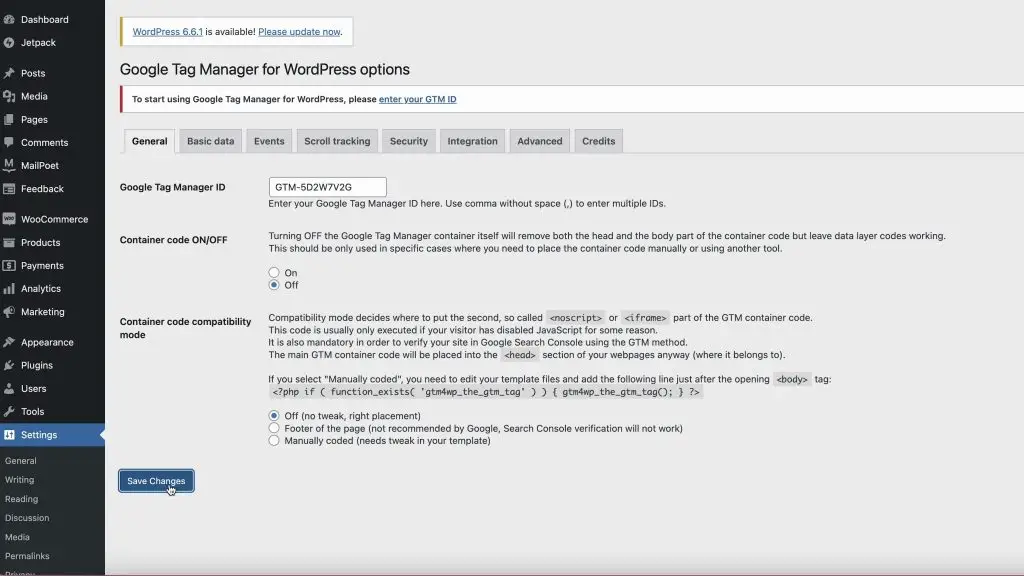
- Configure Plugin Settings: In the plugin settings under the General tab, add your Google Tag Manager ID. Then Save changes.
- Set Up WooCommerce Integration: In the Integration tab, enable Track e-commerce, Cart content in data layer, Customer data in data layer, and Order data in the data layer. Then Save changes.

Creating Tags and Triggers for ecommerce tracking
- Create a New Tag: In Google Tag Manager (GTM), create a new tag and name it ‘Google Analytics 4 E-commerce’. For Tag Configuration, select the Google Analytics: GA4 Event.

- Enter Measurement ID: Input your GA4 data stream ID. You can create a constant for the ID to simplify the process.
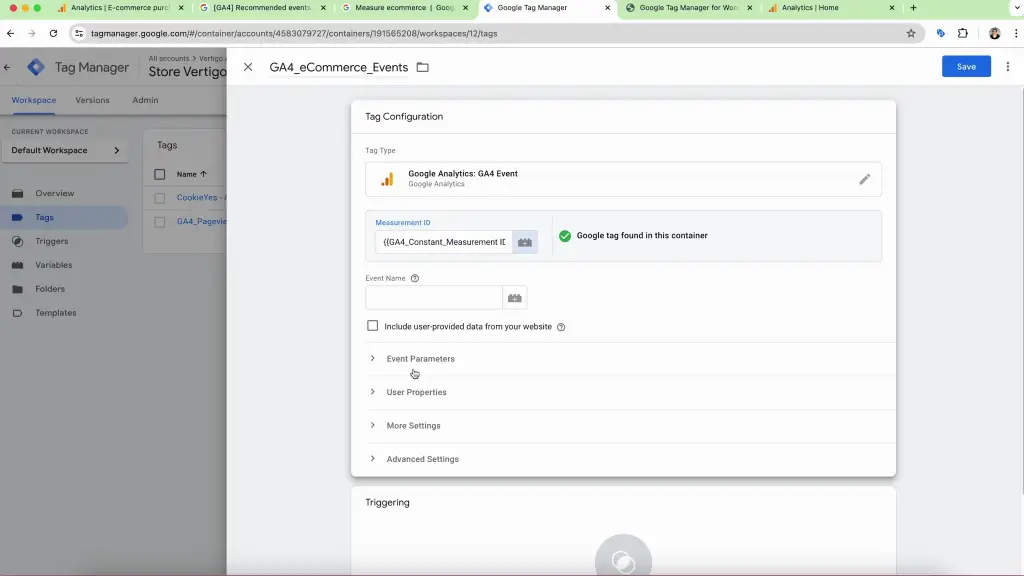
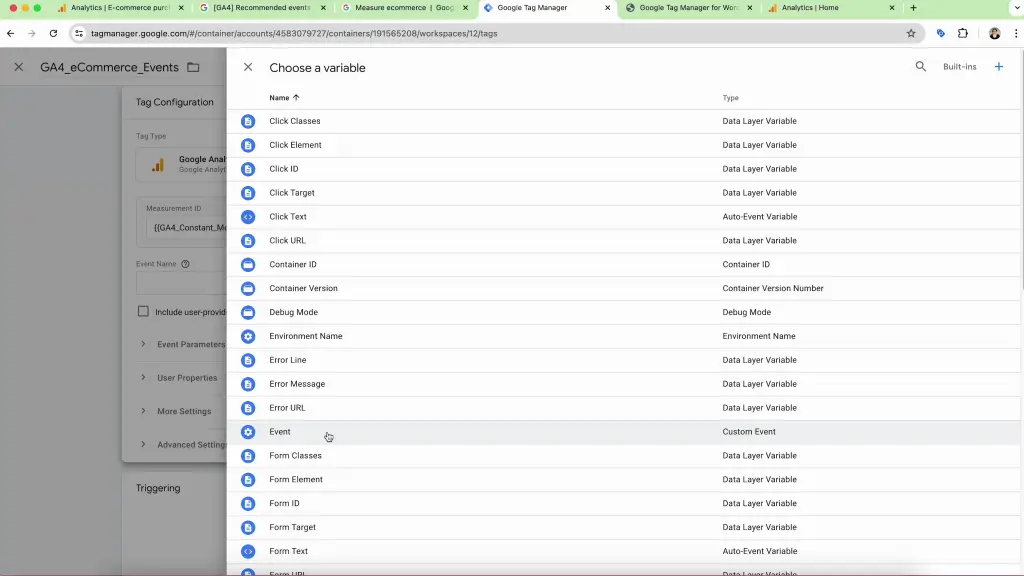
- For the Event Name, click on the plus icon on the right and choose Event.
- In More Settings, choose Send Ecommerce Data and leave the Data Layer option enabled.
- In Advanced Settings, go to Consent Settings and choose No additional consent required, since this is a Google tag with built-in consent. However, make sure you have done the setup according to this Consent Mode v2 article.
- Set Up Triggers: Create a trigger named ‘eCommerce All Events’. Choose the Trigger Type as Custom Event. Enable Use regex matching and add these events:
view_item|select_item|add_to_cart|remove_from_cart|view_cart|begin_checkout|add_payment_info|add_shipping_info|purchase
The tag will fire when any of these events will happen in the user’s journey. Save the trigger and then save the tag.

Testing and Publishing
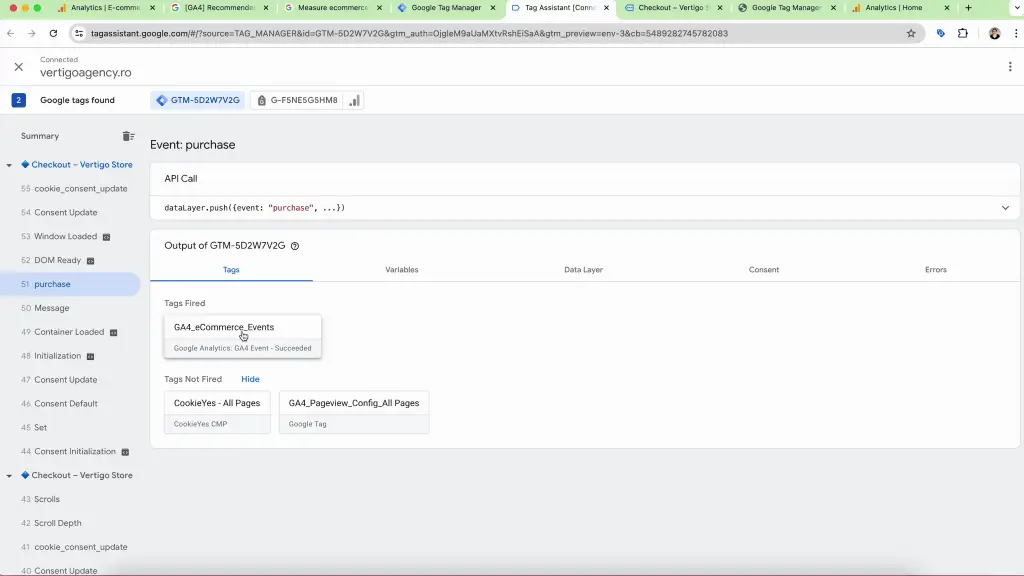
- Simulate a Purchase: In Google Tag Manager, click on Preview and simulate a purchase on your site: add a product to the cart, proceed to checkout, and place an order.
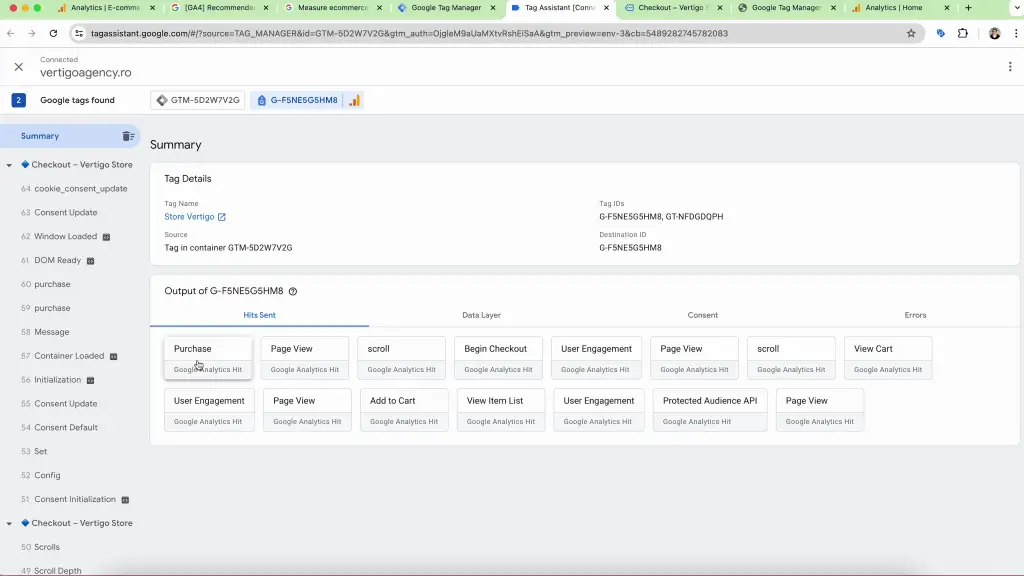
- Check Data Layer and Tag Activation: In Tag Assistant, for any event from the Summary sidebar, verify that the tag, GA4_eCommerce_Events is firing correctly and that the data layer contains the expected information.
- Publish Changes: Once confirmed, publish your Google Tag Manager container to make the changes live.
Verifying Ecommerce Tracking in GA4
After setting up and publishing the ecommerce tracking setup, after 24-48 hours, navigate to your GA4 property to verify that e-commerce data is being collected. Check the e-commerce reports to ensure they display accurate data about user actions on your site.
Conclusion
Setting up ecommerce tracking in Google Analytics 4 using Google Tag Manager is a powerful way to gain insights into your online store’s performance. By following this guide, you can ensure that your e-commerce data is accurately tracked and leveraged for better business decisions.
Don’t forget to subscribe to our channel for more tutorials, and stay tuned for more insights on using Google Tag Manager and Google Analytics 4.
Flavia Groza-Bocăneț